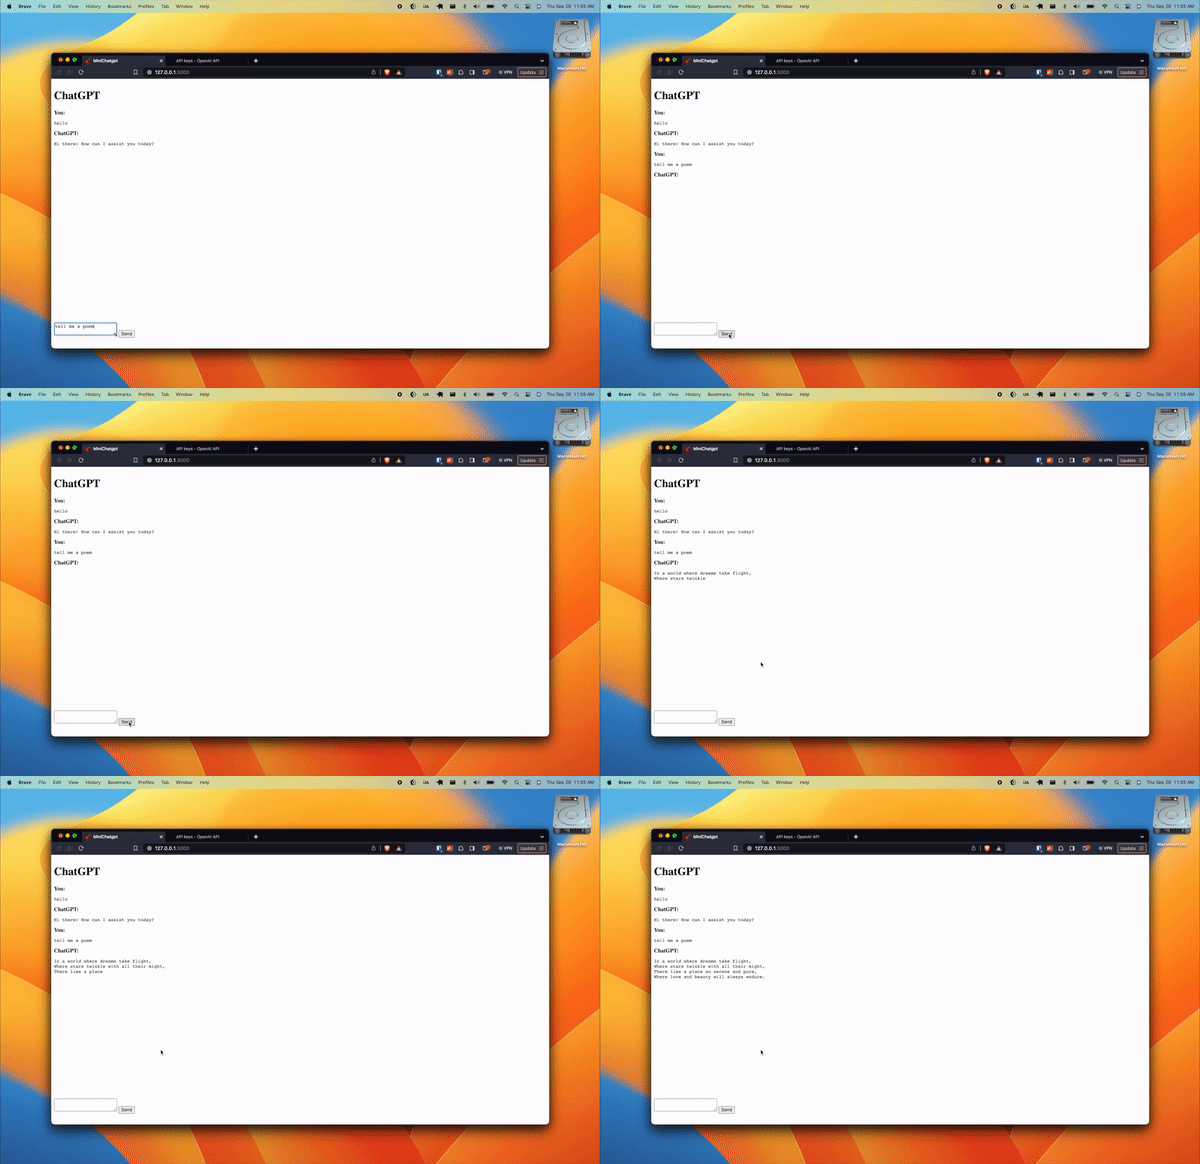
Build Your Own ChatGPT with Ruby on Rails 7 and OpenAI API
A Step-by-Step Guide to Crafting a Lightweight Chatbot Using Ruby on Rails 7 and OpenAI's GPT API
When it comes to creating real-time applications, Ruby on Rails offers a robust platform that allows you to develop feature-rich apps quickly. Today, we're diving into building a MiniChat GPT clone—a conversational app that mimics the GPT (Generative Pre-trained Transformer) API for chat responses.
Setting up the Rails project
Let's kick off by creating a new Rails app called mini-chatgpt.
rails new mini-chatgptThen, we add ruby-openai and dotenv-rails to our Gemfile to manage the necessary dependencies.
gem "ruby-openai", "~> 5.1"

group :development, :test do
  gem 'dotenv-rails'
end
Run bundle install to install these gems.
Setting up the basic UI
Create a ChatsController to handle the main chat interface.
rails g controller chatsThis controller will serve the application UI, so we’ll add an index route.
class ChatsController < ApplicationController
  def index
  end
end
And make this the root path for the application.
Rails.application.routes.draw do
  root "chats#index"
end
We’ll update the HTML and CSS for the index route to make a basic ChatGPT-like UI.
<div class="chat-container">
  <h1>ChatGPT</h1>
  <section class="chat-conversation">
  </section>
  <%= form_with do |form| %>
    <div class="chat-input">
      <%= form.text_area :message, id: 'prompt' %>
      <%= form.submit 'Send' %>
    </div>
  <% end %>
</div>
Update application.css to create a basic layout.
.chat-container {
    display: flex;
    flex-direction: column;
    height: 95vh; /* takes full viewport height */
}

.chat-conversation {
    flex-grow: 1; /* takes up all available space */
    overflow-y: auto;
}

.chat-input {
    flex-shrink: 0; /* prevents the input from shrinking */
}Streaming the responses from the ChatGPT API
Next, you’ll need to go to OpenAI’s developer portal to create an API key. Once you’ve got it, create a .env file at the root of your project to make the key available in your environment.
OPENAI_ACCESS_TOKEN=sk-6kBnWQ3sntjGuhUUCtMLT3BlbkFJ9LzEONDF6g4TKqofcU2yEnsure you’ve added .env to your .gitignore to prevent your secret from being exposed in git.
We’re now ready to build a controller to handle streaming responses from the ChatGPT API. For this we’ll create a new controller:
rails g controller chat_responsesThis will be a singular resource with only a show route.
Rails.application.routes.draw do
  root "chats#index"
  resource :chat_responses, only: [:show]
end
In our controller, we can leverage ActionController::Live to let us send server-sent events from the client. This is the technology OpenAI uses in their API and it’s the technology we’re going to use in our implementation.

Note there are other ways to implement a streaming response using Turbo but this involves quite a bit more machinery to set up.
class ChatResponsesController < ApplicationController
  include ActionController::Live

  def show
    response.headers['Content-Type']  = 'text/event-stream'
    response.headers['Last-Modified'] = Time.now.httpdate
    sse                               = SSE.new(response.stream, event: "message")
    client                            = OpenAI::Client.new(access_token: ENV["OPENAI_ACCESS_TOKEN"])

    begin
      client.chat(
        parameters: {
          model:    "gpt-3.5-turbo",
          messages: [{ role: "user", content: params[:prompt] }],
          stream:   proc do |chunk|
            content = chunk.dig("choices", 0, "delta", "content")
            return if content.nil?
            sse.write({ message: content })
          end
        }
      )
    ensure
      sse.close
    end
  end
end
A few things to point out here:
Content-Typespecifies that the response will be of typetext/event-stream, which is for SSE.Last-Modifiedsets the last modified time to the current time, which can be used for caching mechanisms. This is needed because of a bug introduced in 2.2.x of Rack.After streaming the response from OpenAI’s API, we need to be sure to close the connection via
see.close.
Dynamically updating the UI with Stimulus
All the backend components are in place. Now we’re ready to use JavaScript to put it all together. For this, we’ll use Hotwire’s JavaScript framework Stimulus. Create a Stimulus controller named Chat.
rails g stimulus chatUpdate index.html.erb and add data attributes to connect to the new Stimulus controller. We’ll use the
conversationtarget to dynamically append new DOM elements to the screen.prompttarget to pull what the user wants to ask ChatGPT.
<div class="chat-container" data-controller="chat">
  <h1>ChatGPT</h1>
  <section class="chat-conversation" data-chat-target="conversation">
  </section>
  <%= form_with data: { action: "chat#generateResponse" } do |form| %>
    <div class="chat-input">
      <%= form.text_area :message, id: 'prompt', data: { chat_target: "prompt" } %>
      <%= form.submit 'Send' %>
    </div>
  <% end %>
</div>
Once the form is submitted, we’ll call the generateResponse action on the Stimulus controller. This will handle
Appending the user’s prompt to the conversation
<section>.Connecting the server via the
EventSourceAPI to receive the streamed response and append the response to the conversation<section>.And finally, clear the user’s prompt from the
<textarea>, and close theEventSource.
import {Controller} from "@hotwired/stimulus"

// Connects to data-controller="chat"
export default class extends Controller {
  static targets = ["prompt", "conversation"]

  generateResponse(event) {
    event.preventDefault()

    this.#createLabel('You')
    this.#createMessage(this.promptTarget.value)
    this.#createLabel('ChatGPT')
    this.currentPre = this.#createMessage()

    this.#setupEventSource()

    this.promptTarget.value = ""
  }

  #createLabel(text) {
    const label = document.createElement('strong');
    label.innerHTML = `${text}:`;
    this.conversationTarget.appendChild(label);
  }

  #createMessage(text = '') {
    const preElement = document.createElement('pre');
    preElement.innerHTML = text;
    this.conversationTarget.appendChild(preElement);
    return preElement
  }

  #setupEventSource() {
    this.eventSource = new EventSource(`/chat_responses?prompt=${this.promptTarget.value}`)
    this.eventSource.addEventListener("message", this.#handleMessage.bind(this))
    this.eventSource.addEventListener("error", this.#handleError.bind(this))
  }

  #handleMessage(event) {
    const parsedData = JSON.parse(event.data);
    this.currentPre.innerHTML += parsedData.message;

    // Scroll to bottom of conversation
    this.conversationTarget.scrollTop = this.conversationTarget.scrollHeight;
  }

  #handleError(event) {
    if (event.eventPhase === EventSource.CLOSED) {
      this.eventSource.close()
    }
  }

  disconnect() {
    if (this.eventSource) {
      this.eventSource.close()
    }
  }
}
Wrapping up
We now have a basic ChatGPT app working.
Subscribe for more Ruby on Rails and web development content.


